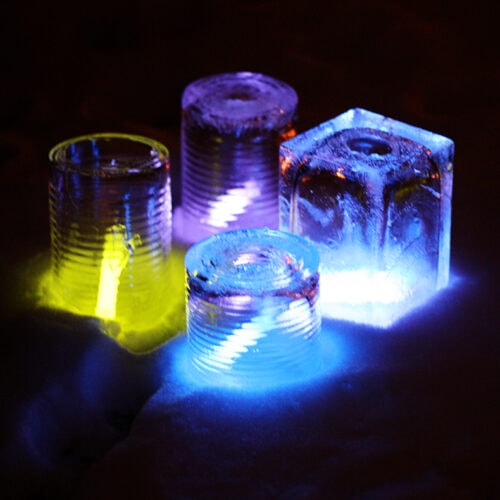
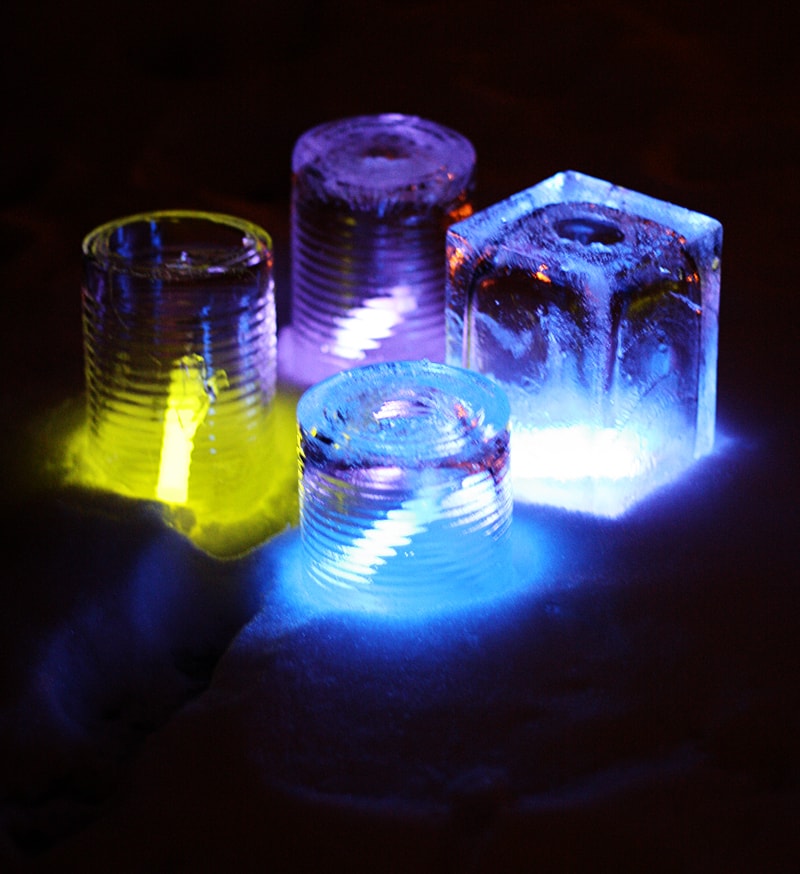
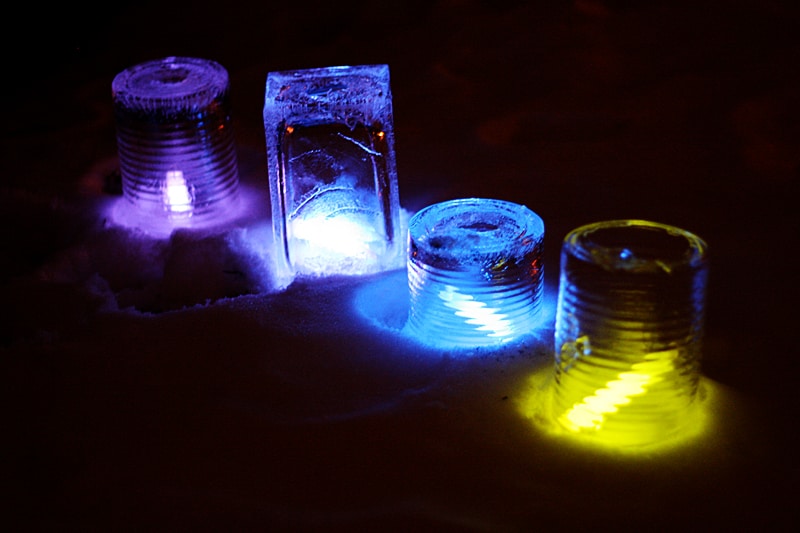
The cold weather and snow continues to pummel the country. So it seemed a fitting time to share with you these ice luminaries.
Why we love this project
Have you ever heard of a Scandinavian Ice Candle? They are actually made with a big five gallon bucket and you can see the process at the video BELOW the link to my tutorial within this post. That’s where I got my inspiration for this miniature version :)
I found some other fun snow activities over at Happy Hooligans when you’re done making these luminaries! She also has a recipe for making ice cream from snow here.
Craft supplies you will need
The outdoor temperature will need to be below freezing. Alternatively, you can use your refrigerator’s freezer if you have room for the containers to stand upright.
- Tall cans or plastic containers
- Water
- Glow sticks
How to Make Ice Luminaries
These step by step photos and instructions are here to help you visualize how to make this project. Please scroll down to simply print out the instructions!
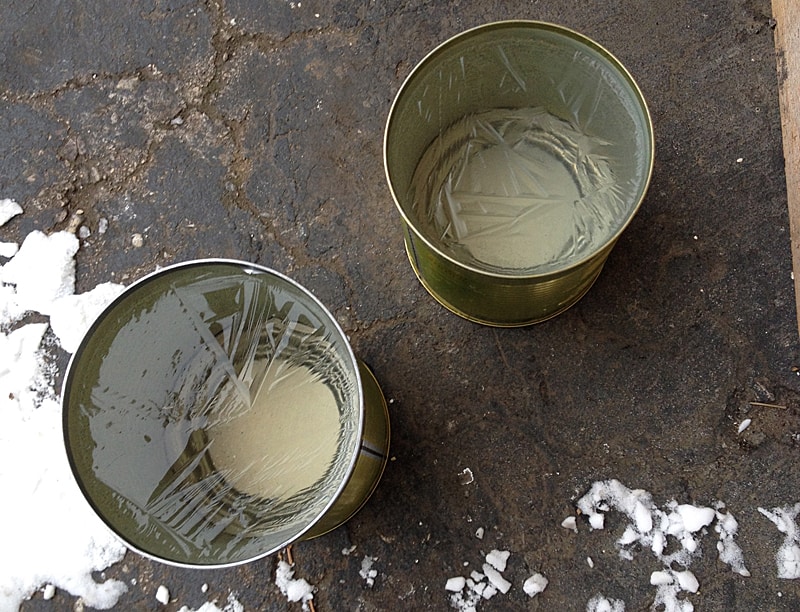
- Fill containers with water and place them outside. After about an hour, they will have begun to freeze over.

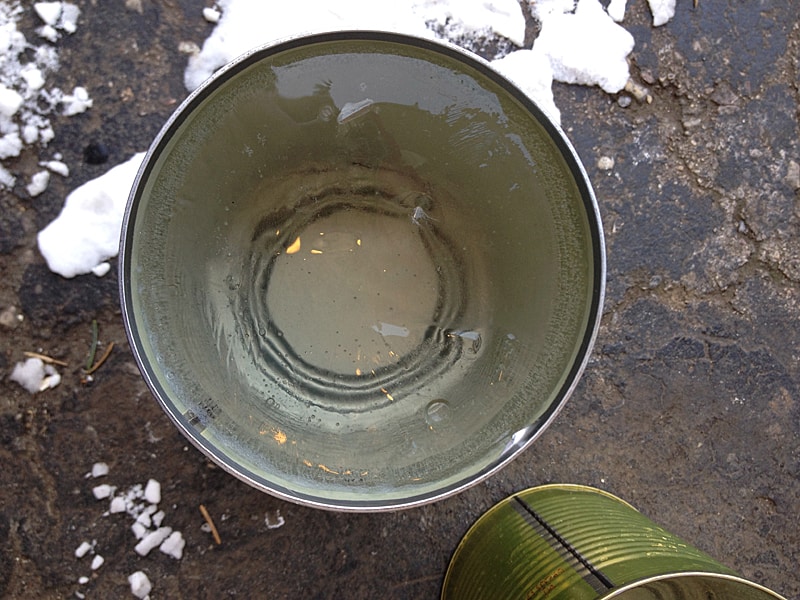
- After 3-4 hours, depending on how cold it is outside and the size of your container, the ice at the top of the container will be solid. The sides should have frozen as well, and chances are you will see a couple of air bubbles under the ice. That’s because the center hasn’t frozen yet. Now it’s time to take them inside.

- Allow them to sit inside on the counter for about ten minutes to thaw slightly. Holding the container over the sink, place your hand on top of the container and turn the container upside down. Depending on how much it thawed, your ice may or may not slide right out. You can give it a tap or two on the bottom and try to coax it out. If it just isn’t budging, give it another five minutes or so to thaw.

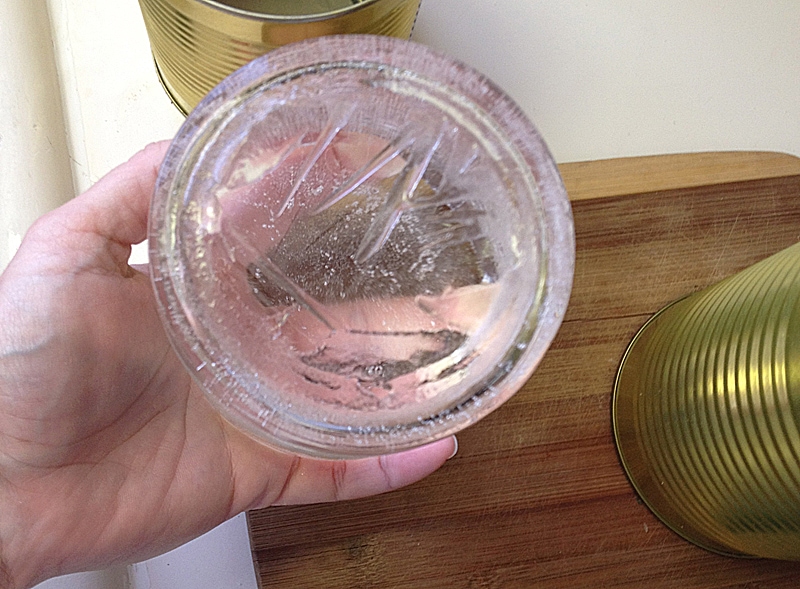
- Keeping it over the sink is important. Once your ice slides out of the container, depending on how frozen the bottom is, water will be released from the center of the ice. If the bottom is still solid as pictured above, tape it gently in the middle with a butter knife to create a hole about the size of a quarter and pour the water out.
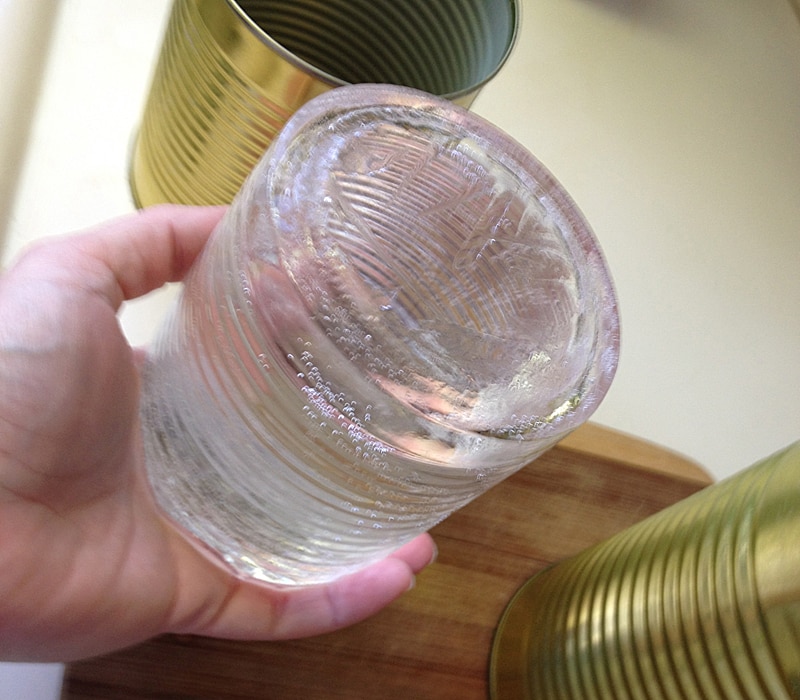
- If the ice on the bottom of the container was fairly thin, you may have the entire bottom open like this. Either way is fine!

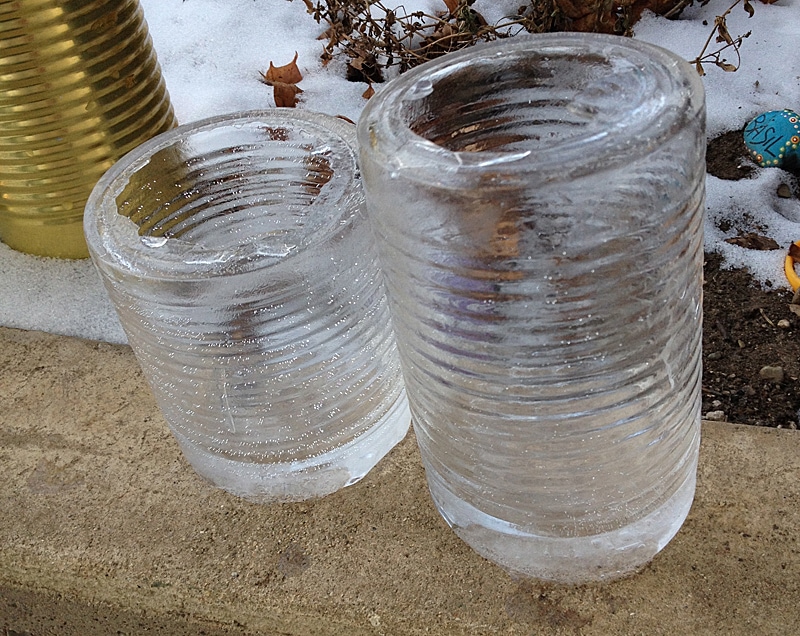
- Take your ice luminaries outside and place them wherever you are going to use them (in the snow, along the sidewalk edge, edge of steps, etc). The reason it’s important to place them where you plan to use them is because the ice has thawed a bit. Once you place it back outside the ice will harden and the bottom of the luminary will freeze to whatever surface it is placed on!

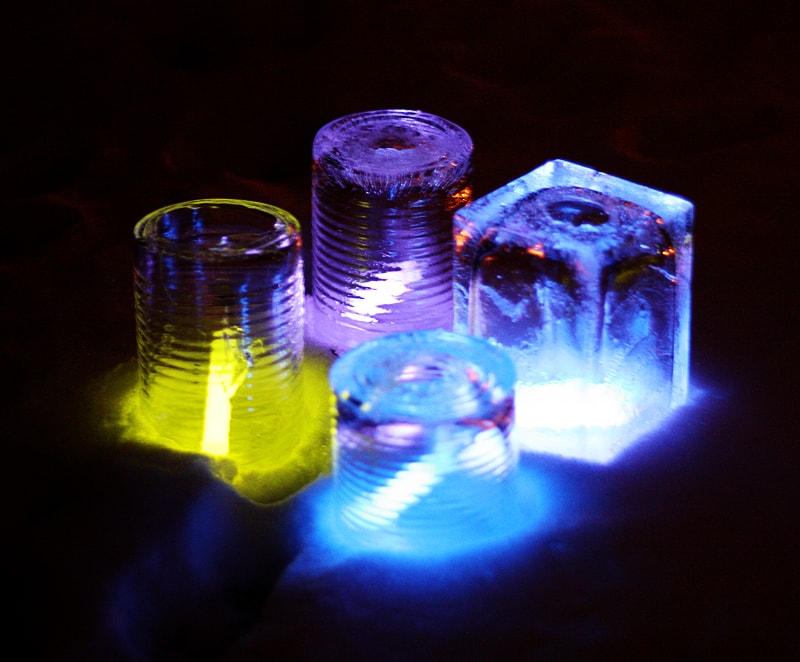
When it gets dark, crack your glow sticks and drop them into the center of the luminary!
Expert Crafting Tips
If you would like to be able to reposition your luminaries, place them in some snow that’s t least a few inches deep, rather than on a hard surface. They will still freeze, but you will be able to pick them up and move them to a different location.
This is a fun way to keep the winter blahs at bay. Enjoy!
More Winter Ideas
I love to create and share my projects with you! I know it’s hard to remember to come back and search, so I’ve made it easy for you with my weekly newsletter! You can subscribe for free and I’ll send you fun crafts and delicious recipes every week right to your email.

Ice Luminaries
Supplies
- Tall cans or plastic containers
- Water
- Glow sticks
Instructions
- Fill containers with water and place them outside. After about an hour, they will have begun to freeze over.
- After 3-4 hours, depending on how cold it is outside and the size of your container, the ice at the top of the container will be solid. The sides should have frozen as well, and chances are you will see a couple of air bubbles under the ice. That’s because the center hasn’t frozen yet. Now it’s time to take them inside.
- Allow them to sit inside on the counter for about ten minutes to thaw slightly. Holding the container over the sink, place your hand on top of the container and turn the container upside down. Depending on how much it thawed, your ice may or may not slide right out. You can give it a tap or two on the bottom and try to coax it out. If it just isn’t budging, give it another five minutes or so to thaw.
- Keeping it over the sink is important. Once your ice slides out of the container, depending on how frozen the bottom is, water will be released from the center of the ice. If the bottom is still solid as pictured above, tape it gently in the middle with a butter knife to create a hole about the size of a quarter and pour the water out.
- If the ice on the bottom of the container was fairly thin, you may have the entire bottom open like above. Either way is fine!
- Take your ice luminaries outside and place them wherever you are going to use them (in the snow, along the sidewalk edge, edge of steps, etc). The reason it’s important to place them where you plan to use them is because the ice has thawed a bit. Once you place it back outside the ice will harden and the bottom of the luminary will freeze to whatever surface it is placed on!
Expert Tips & FAQs
Here’s the video:
- Tie Dye Beach Towels - July 24, 2026
- Swirling Twirling Ladybugs - July 21, 2026
- Drip Tie Dye Backpack - July 17, 2026


Vicki says
Love your craft pages.