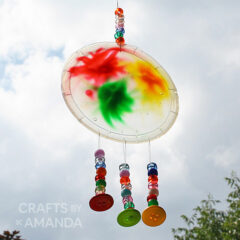
Need a fun and easy craft for the kids that won’t cost an arm and a leg? If you are like me and save plastic lids then this is the perfect rainy day activity or afternoon craft.

Why this project is a hit
I mean, recycling! A lot of recycling centers will take containers but not their caps and lids. I usually save those so I can make more projects with them. You might remember my plastic lid ladybugs from years ago?
Craft supplies you will need
- White craft glue
 (or school glue)
 - Plastic lid (cottage cheese, sour cream, yogurt, etc)
- Liquid food coloring
- Toothpick
- Embroidery floss
- Needle (Parents handle this if creating with young kids)
- Pony beads
- 3 (4-hole) buttons

Helpful Project Information:
- Age Level: 4 and up
- Mess Factor: Medium (glue)
- Level of Difficulty: Medium (threading)
- Time to Complete: 20 minutes
- Cost Estimate: Less than $1.00
How to Make a Colorful Glue Suncatcher
These step by step photos and instructions are here to help you visualize how to make this project. Please scroll down to simply print out the instructions!
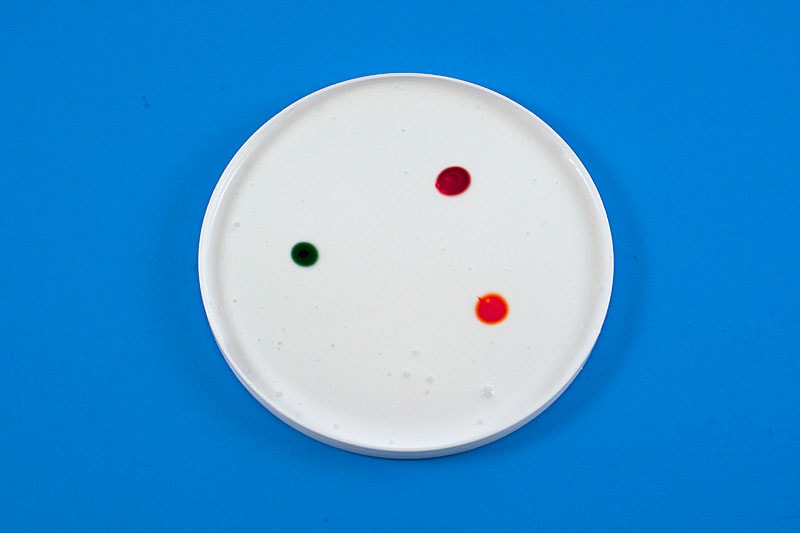
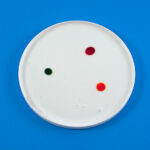
- Place lid upside down on the table and fill it with glue. Add three drops of food coloring in three different places in the glue.
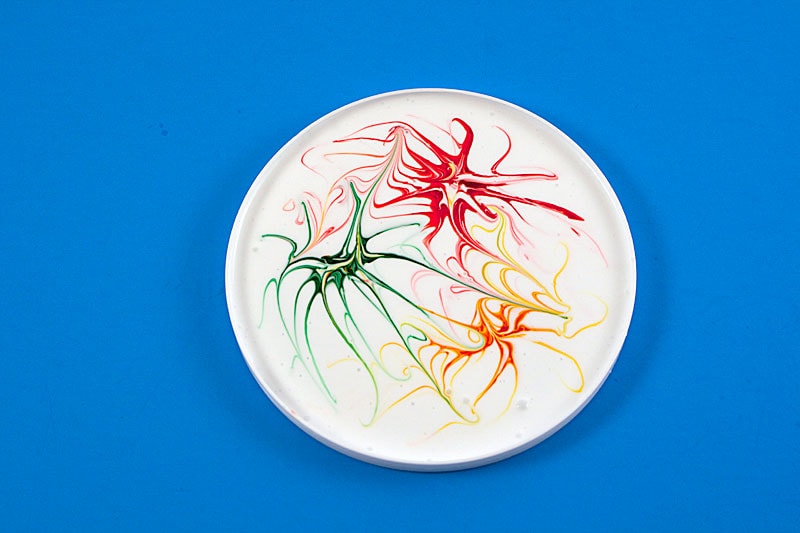
- Use a toothpick to swirl the food coloring around in the glue.

- This photo is an example of when is a good time to stop. The color will spread a lot more than this as it sits and if you swirl it too much you’ll end up with just a brown design instead of a colorful one.
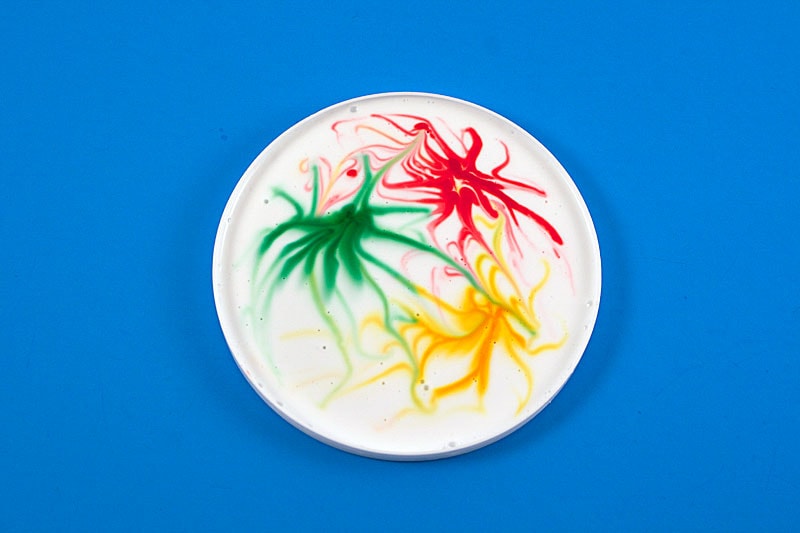
- The photo below is what my design looked like after an hour of sitting. See how the colors have begun to spread?
- Now here’s the hard part. Put the lid somewhere it will remain undisturbed for 5-6 days. You can check it after 4 days by reaching into the lid then carefully pulling back the dried glue. Peel slowly and if you see wet glue, return it to its original position and let it dry longer. Once the design is completely dry, peel it out of the lid.
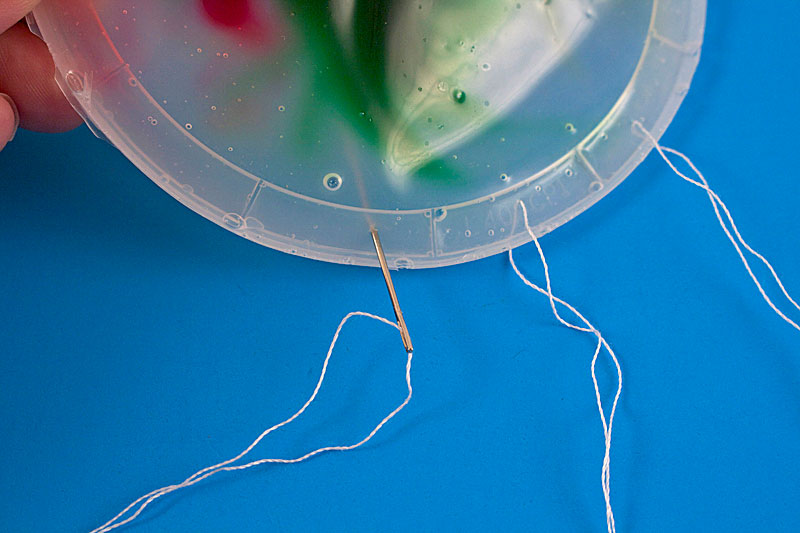
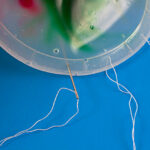
- Parents: Thread the needle and poke it through the bottom of the sun catcher.
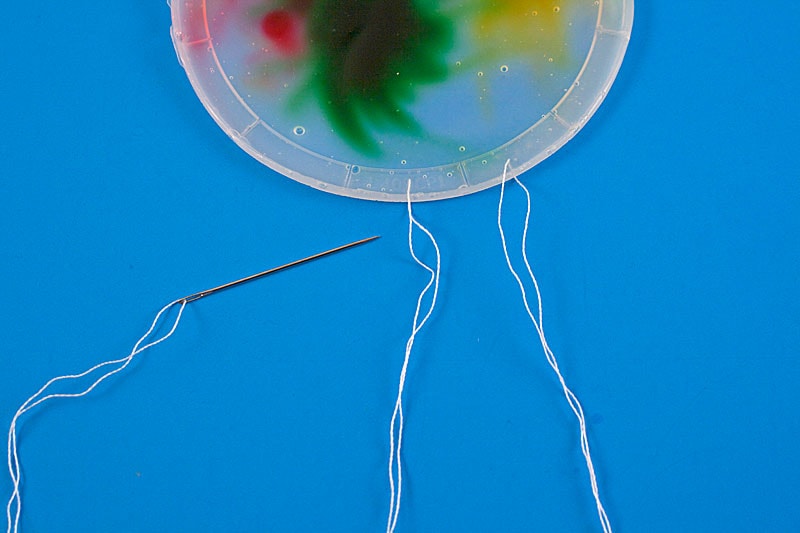
- Pull the thread through, take off the needle and line up the two ends of the thread.
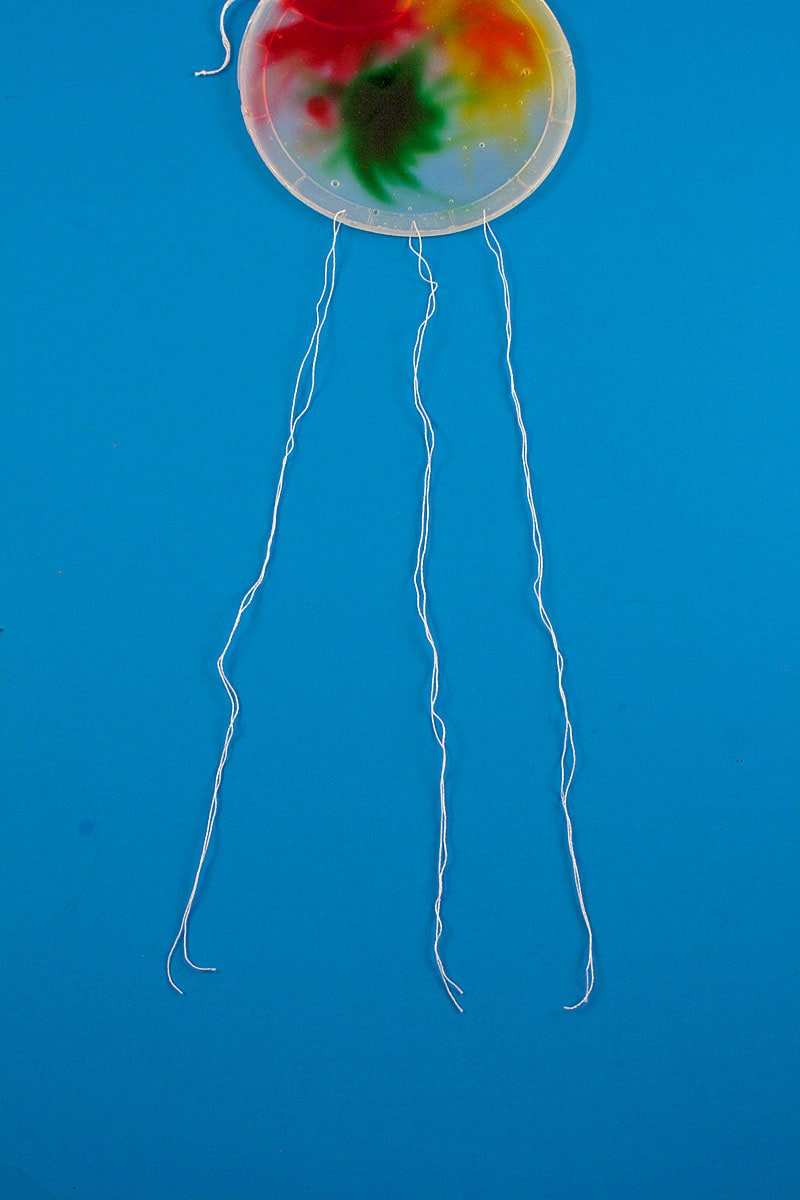
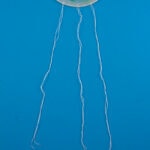
- Repeat two more times for a total of three hanging strings about 8 or 9 inches long.
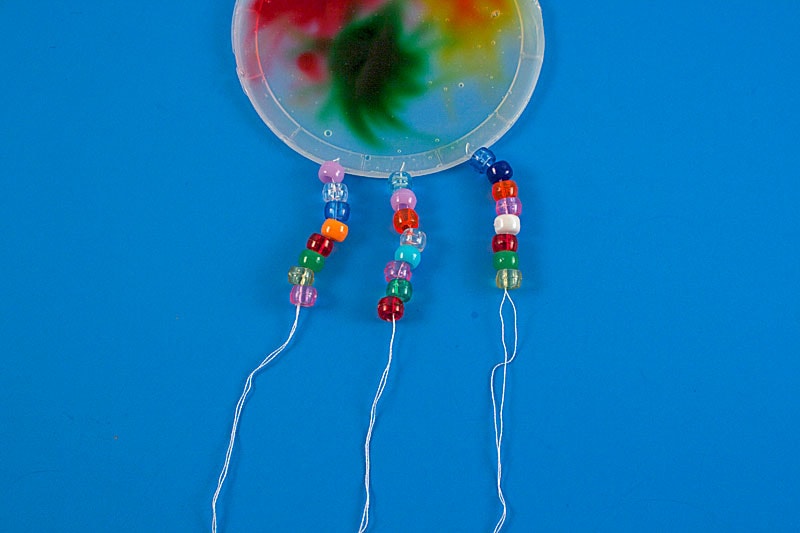
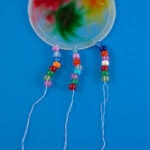
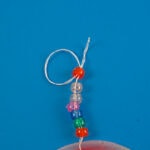
- Now have your little ones thread some pony beads onto each set of strings; I used eight beads on each one.
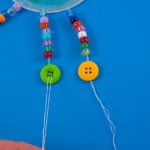
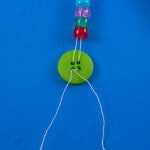
- Thread the two strings through a 4-hole button, running the thread up through two holes and back down through the other two holes.
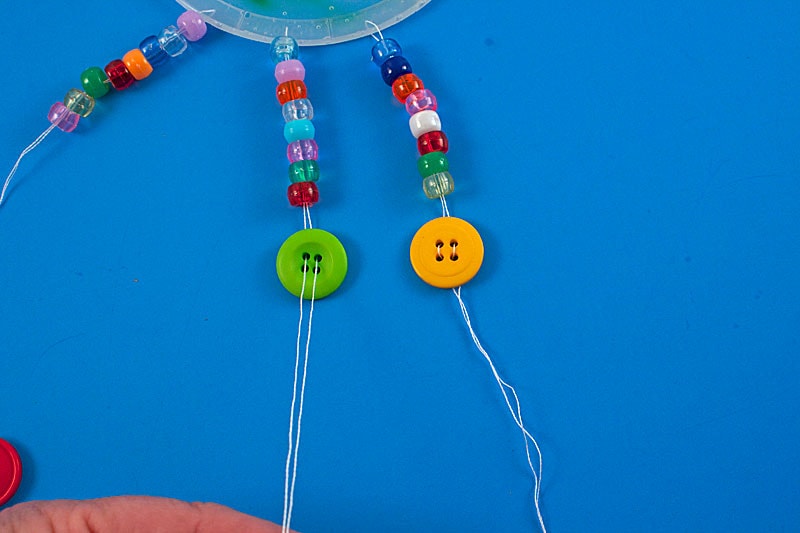
- Turn the button over and tie a knot in the string three times. Trim off the excess string.

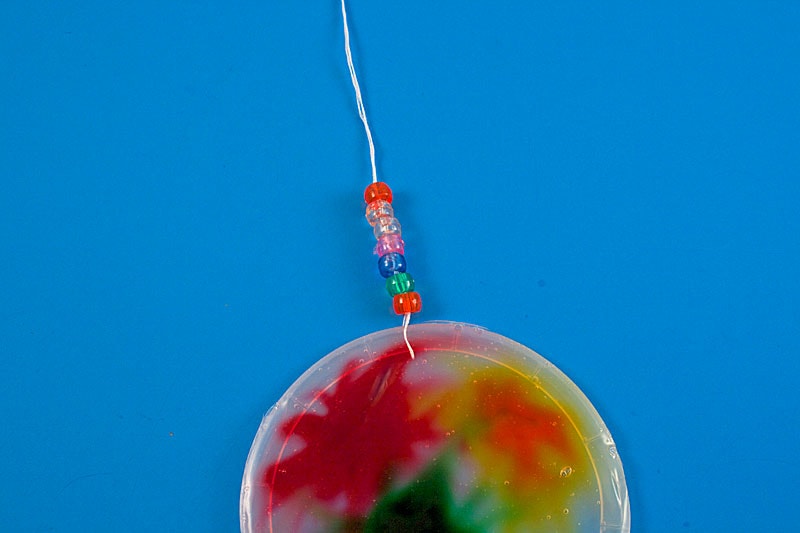
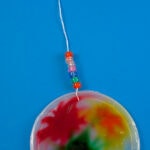
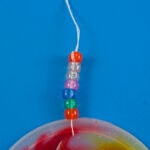
- Thread a needle with one strand of embroidery floss. Poke the needle through the top of the sun catcher, tie that in a knot for the hanger. Thread several pony beads onto the hanger. I used seven.
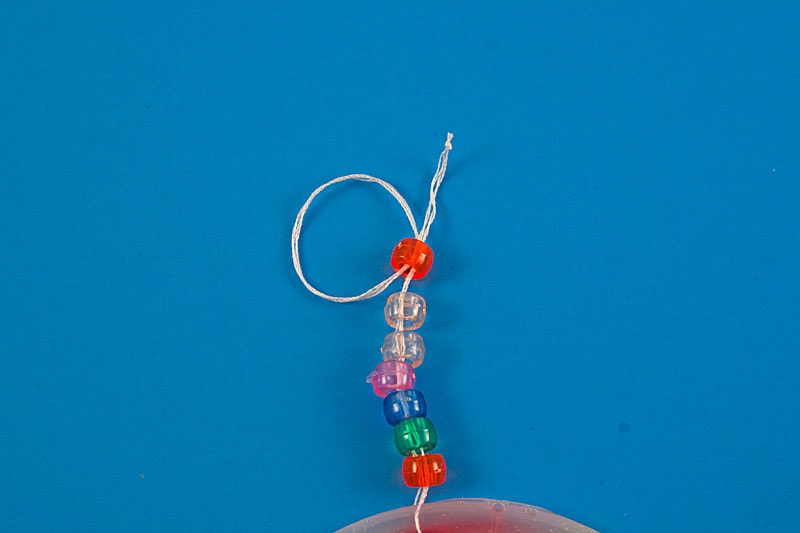
- Loop the string back through the final bead.
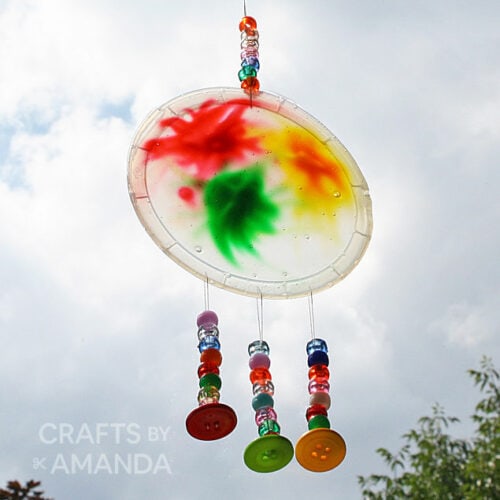
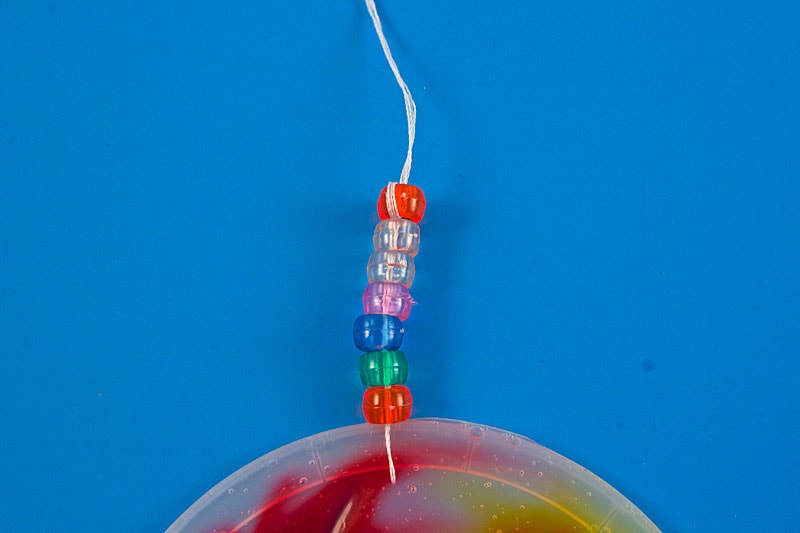
- Pull that string tight. Now all you have to do is hang it up and marvel at its beauty!
Expert Tips & FAQs
While this project doesn’t take long to make, it has a long dry time, about 5-6 days. While it is just regular white craft glue, a thick layer like this takes time to dry.
The outer layer will dry first, locking in the wet glue underneath, not allowing as much air to touch it. Hence the drying must rely on evaporation, and without a lot of room for the moisture to escape, it slows the dry time considerably.
I suggest turning this into two separate craft projects. The first one is making the sun catcher, and the second one a week later to embellish it.
This is great as a group project too. I hope you and the kids have fun!

More Recycled Crafts for Kids
- Recycled Plastic Lid Windchime
- Plastic Lid Monsters
- Make a Robot from a Cereal Box
- Rainbow Button Wind Chime
- Margarine Tub Boat
I love to create and share my projects with you! I know it’s hard to remember to come back and search, so I’ve made it easy for you with my weekly newsletter! You can subscribe for free and I’ll send you fun crafts and delicious recipes every week right to your email.
Check our more fun suncatcher ideas like our adorable watermelon suncatcher, a candy corn suncatcher, or our easter egg suncatcher!
Colorful Glue Suncatcher
Supplies
- White craft glue or school glue
- Plastic lid cottage cheese, sour cream, yogurt, etc
- Liquid food coloring
- Toothpick
- Embroidery floss
- Needle Parents handle this if creating with young kids
- Pony beads
- 3 4-hole buttons
Instructions
- Place lid upside down on the table and fill it with glue. Add three drops of food coloring in three different places in the glue.

- Use a toothpick to swirl the food coloring around in the glue.
- This photo is an example of when is a good time to stop. The color will spread a lot more than this as it sits and if you swirl it too much you’ll end up with just a brown design instead of a colorful one.
- Now here’s the hard part. Put the lid somewhere it will remain undisturbed for 5-6 days. You can check it after 4 days by reaching into the lid then carefully pulling back the dried glue. Peel slowly and if you see wet glue, return it to its original position and let it dry longer. Once the design is completely dry, peel it out of the lid.
- Parents: Thread the needle and poke it through the bottom of the sun catcher.
- Pull the thread through, take off the needle and line up the two ends of the thread.
- Repeat two more times for a total of three hanging strings about 8 or 9 inches long.
- Now have your little ones thread some pony beads onto each set of strings; I used eight beads on each one.
- Thread the two strings through a 4-hole button, running the thread up through two holes and back down through the other two holes.
- Turn the button over and tie a knot in the string three times. Trim off the excess string.
- Thread a needle with one strand of embroidery floss. Poke the needle through the top of the sun catcher, tie that it a knot for the hanger. Thread several pony beads onto the hanger. I used seven.
- Loop the string back through the final bead.
- Pull that string tight. Now all you have to do is hang it up and marvel at its beauty!


Expert Tips & FAQs
I originally made this project for Kix Cereal.
This post originally appeared here on Jul 30, 2014.
- Tie Dye Beach Towels - July 24, 2026
- Swirling Twirling Ladybugs - July 21, 2026
- Drip Tie Dye Backpack - July 17, 2026


Jem says
So pretty! I’m confused though about the glue. You say to pull it out after it dries. Does some still remain to keep the color on the lid?
Amanda Formaro says
Hi there! Actually, the final product you see is ALL GLUE! :) It takes on the shape and design of the lid when it dries.
Nicole says
This looks lovely and doesn’t have too many materials either.
Tiffiny says
How hot are the outside temperatures where you live? I’m concerned the glue would actually melt in a desert climate.
Amanda Formaro says
Hi Tiffiny! Actually we’ve had a pretty mild summer with temps in the 70s and 80s. I have had this sun catcher handing in my front living room window since I made it and it’s still doing fine. That particular window gets full afternoon sun and if I don’t close the drapes in the afternoon it gets pretty hot in the room! I was worried about it melting too, but there have been no physical changes to it at all :)