
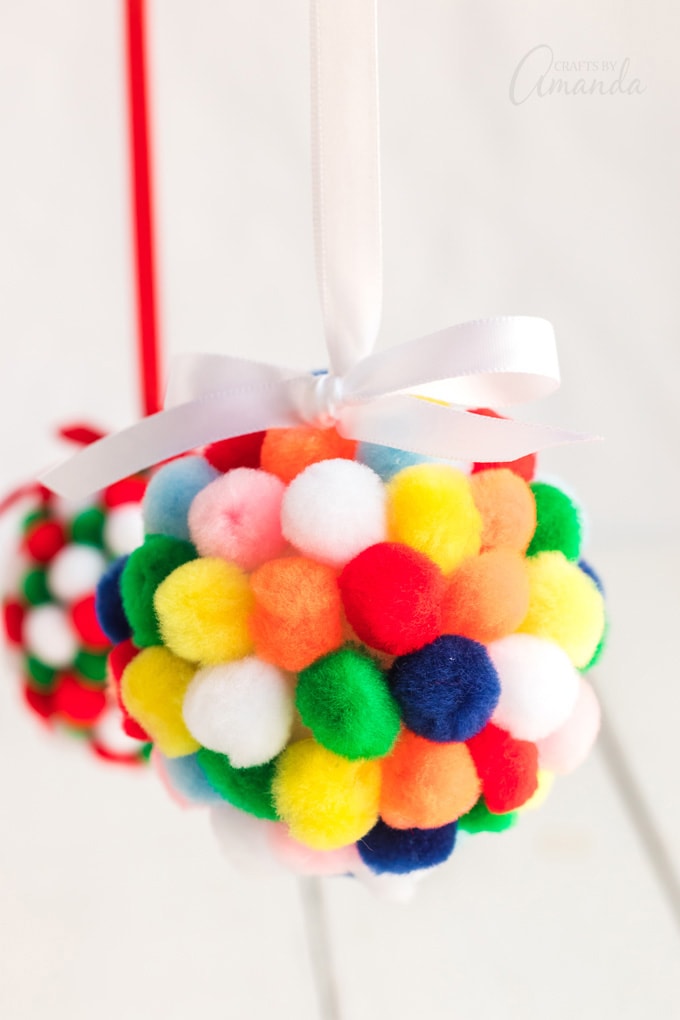
Kids can easily create these super-cute pom pom ornaments! With just a few simple supplies, you can make these fun ornaments to give as gifts or to hang on the Christmas tree. An easy kid’s craft for a fun and festive afternoon.
Pom Pom Ornaments Tutorial
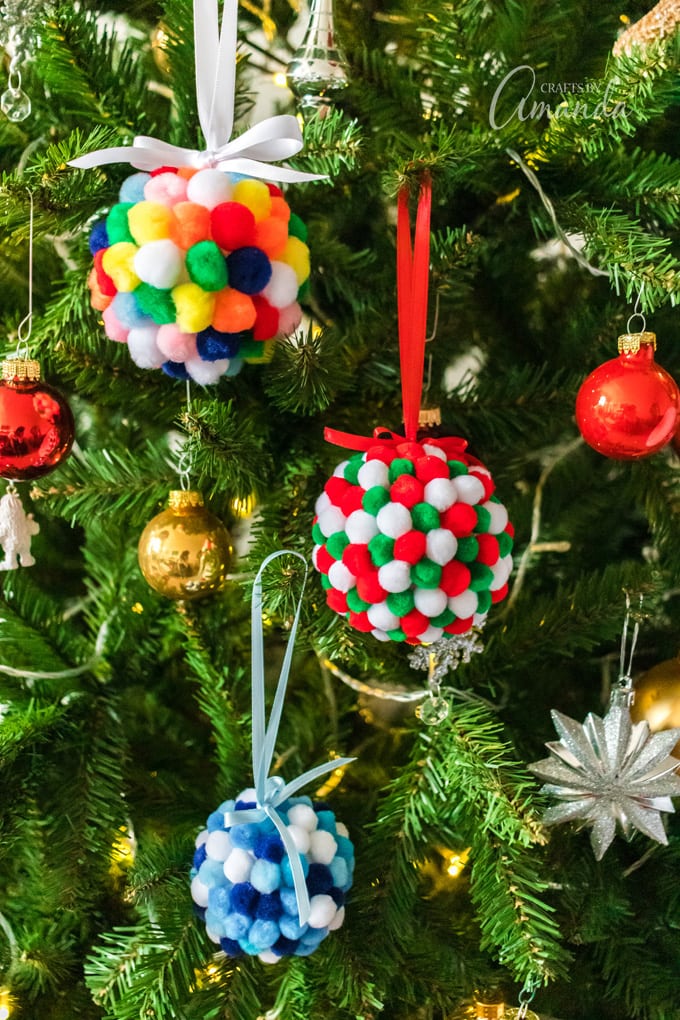
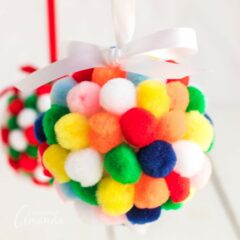
Pom poms make this a colorful project and the tacky glue helps to make it easy to assemble with low mess. Most kids 5 and up can easily manage this project with minimal adult supervision. I made several examples to show you, using balls ranging from 1 1/2″ diameter to 3″ diameter and used pom poms ranging in size up to 1/2.”
Want more ideas using styrofoam balls? Check out my Snowman Garland, and this Jumbo Vintage Snowman Ornament!
Supplies you need to make a Pom Pom Ornament
You probably have a lot of these supplies on hand. Many of these supplies can be found and big box stores and dollar stores.
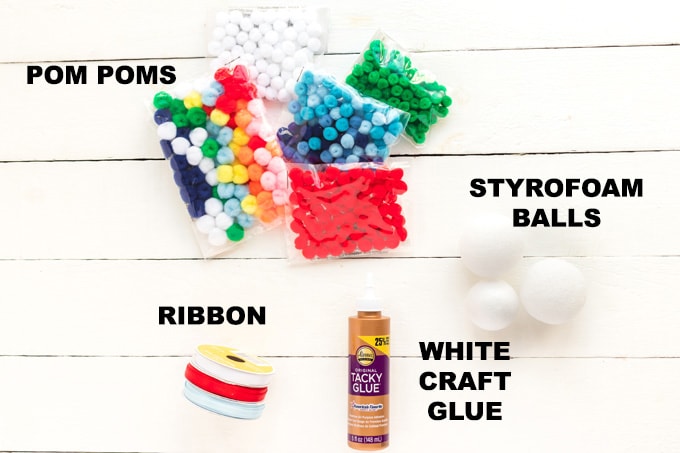
- White Tacky Glue
- Craft Foam Ball in size of your choice. If you prefer to not use craft foam, you can also use a paper mache ball ornament.
- 1 piece 1/4″ wide ribbon in color of your choice, 12″ long
- Assorted color and size pom poms. The amount of poms needed depends on the size of the poms and the ball. I used 60, 1/2″ poms on the 1 1/2″ ball.
- Paper plate or piece of tin foil (I used tin foil)
- A wooden skewer or thin paint brush
- A straight pin
- A flat, covered work surface
Crafting Tips:
- If you are using a paper mache ball, you will need to hold the ball instead of using the skewer.
- You can use white school glue instead of tacky glue.
- If crafting with a group of kids, an adult can prepare steps 1-2 ahead of time and should help with step 5.
- If using a paper mache ornament, the hanger should already be attached and you will be able to skip step 5.
How to make this Pom Pom Ornament
- Put a small amount of tacky glue on the paper plate or piece of tin foil.
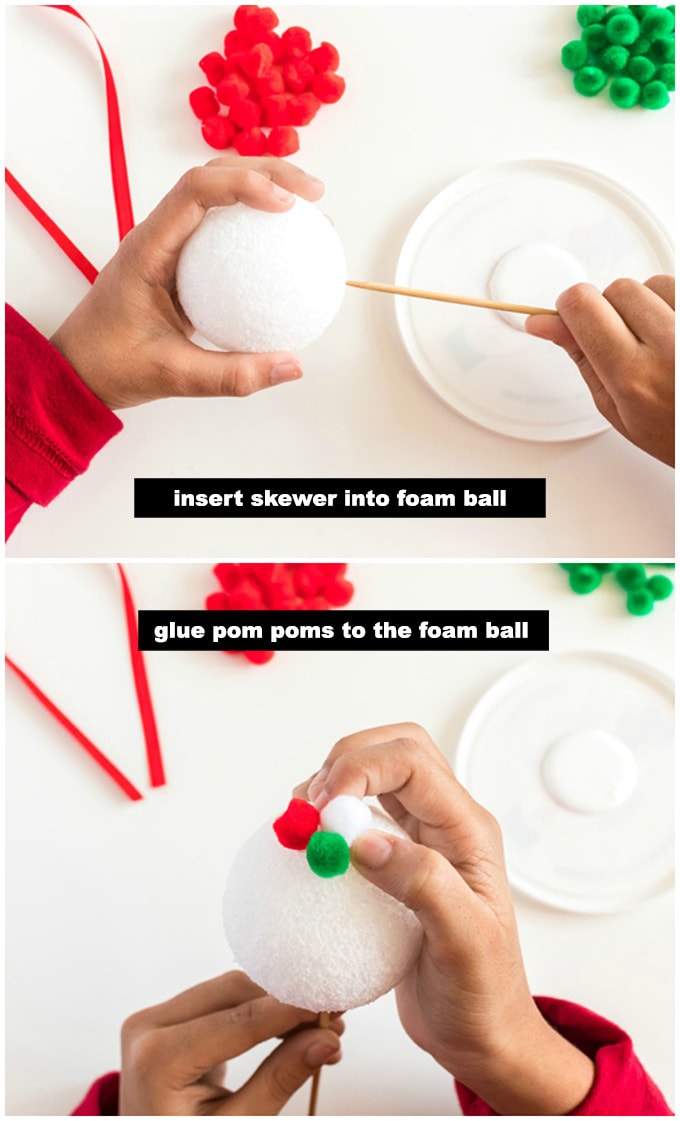
- Insert the wood skewer or the pointed end of the paintbrush into the craft foam ball. This is so you can hold the ball while adding poms. Kind of like a lollipop!
- Plan the design. Kids can mix all sorts of colors or plan a design creating stripes or other designs with specific colored pom poms.
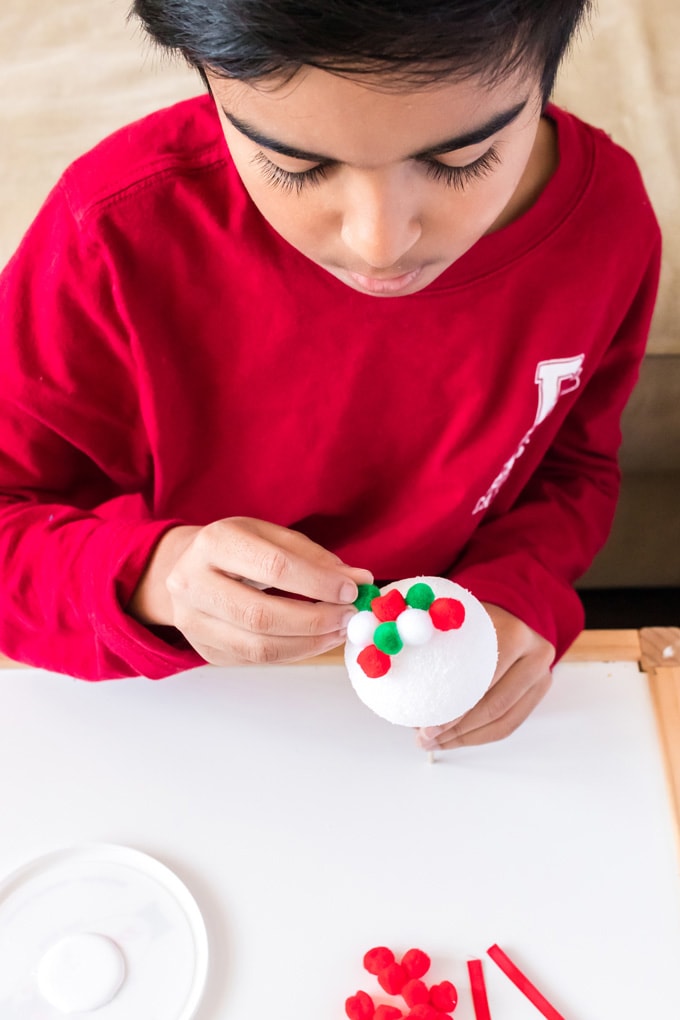
- Glue on pom poms. Dip one pom pom in the tacky glue and then press on to the ball. Continue to dip/add pom poms tucking the poms close together so you don’t see the ball underneath.
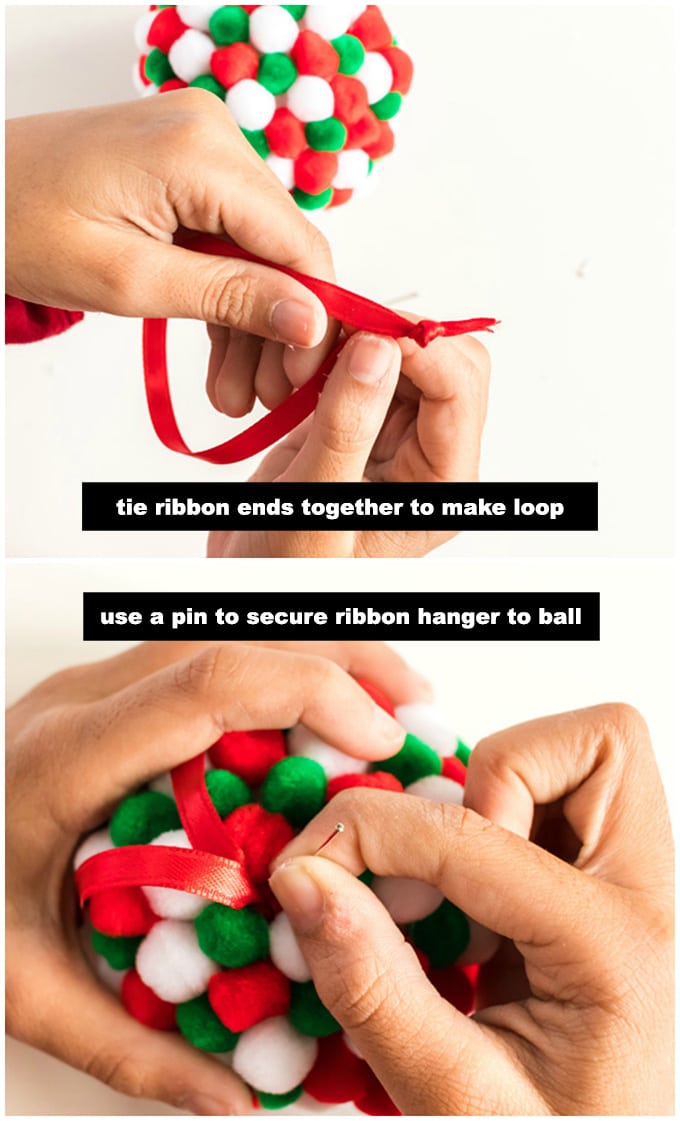
- Add the Ribbon Loop. First, create the ribbon loop for hanging by folding your ribbon in half and tying the 2 ends together. Next with the ribbon still folded, position the end of the ribbon loop in the pom poms so that the end with the knot is at the top (see photo). Push the straight pin through the ribbon and into the foam ball. If you want, you can secure the pin with a dab of glue.
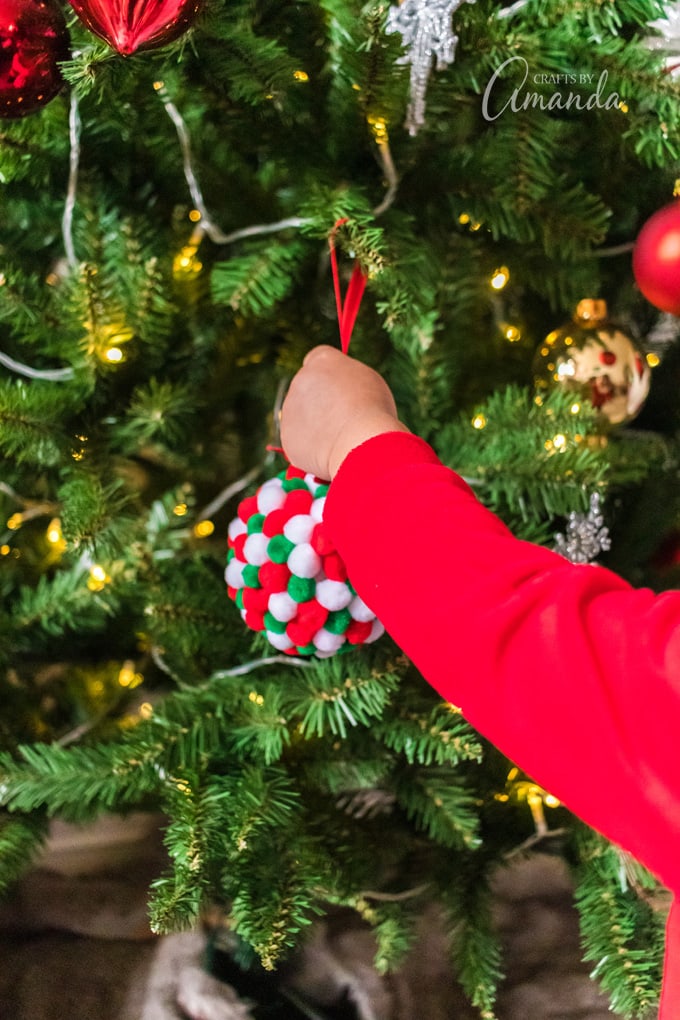
- Let Dry. Gently rest the ornament on a covered work surface. Allow at least 1/2 hour to dry (the paper mache ornament will dry faster than the foam ball).
These ornaments take between 20-40 minutes to make plus the drying time, which makes for a nice afternoon project. If you want a longer or more complex project, you can add small decorations like a ribbon bow, or shake on some glitter (not low mess!)
More Kid-Friendly Christmas Crafts and Ornaments
- Glitter Star Ornaments
- Let It Snow Scrabble Tile Ornament
- Paper Plate Melted Crayon Ornaments
- Christmas Handprint Crafts
- Free Letter To Santa Printable
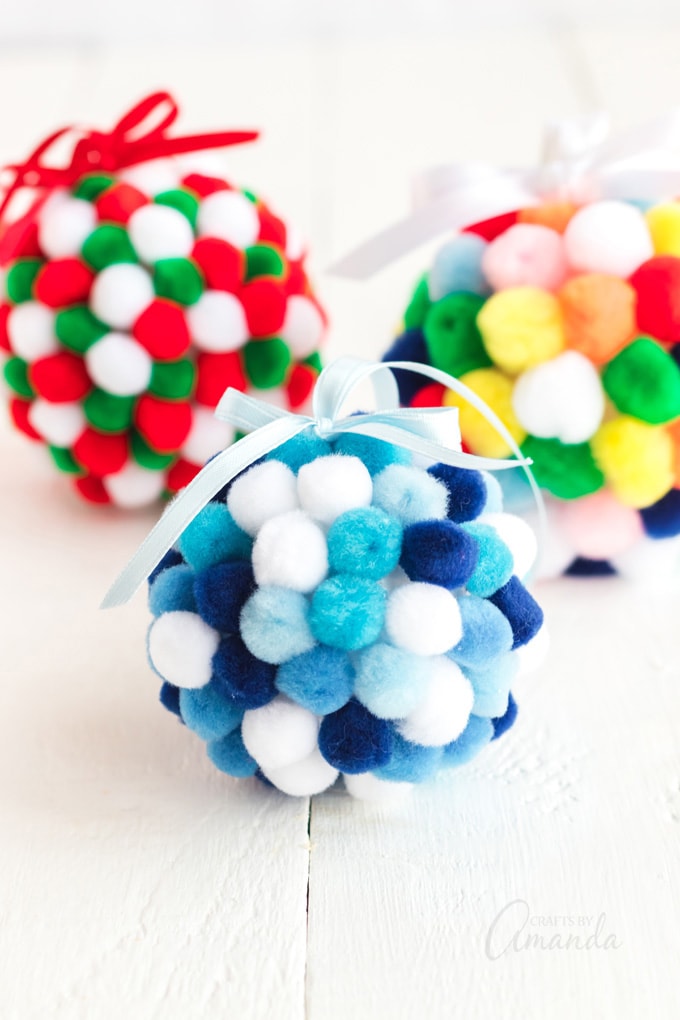
Adding ribbon bows is optional, but makes them so much cuter! These pom pom ornaments look great on a tree or garland, or even attached to a gift box. While they are easy for kids, everyone can have fun making them and decorating for the holidays!
More Adult Christmas Crafts
- Christmas Votive Holders
- Sea Glass Christmas Trees
- Beach Sign Ornaments
- Candy Cane Mason Jar Luminary
- Decoupage Wood Slice Ornaments
Pom Pom Ornaments
Supplies
- White tacky glue
- Styrofoam ball
- 12" long 1/4" wide ribbon
- pom poms Assorted colors and sizes
Craft tools
- Wooden skewer
- Straight pin
- Paper plate or aluminum foil
Instructions
- Put a small amount of tacky glue on the paper plate or piece of tin foil.
- Insert the wood skewer or the pointed end of the paintbrush into the craft foam ball. This is so you can hold the ball while adding poms. Kind of like a lollipop!
- Plan the design. Kids can mix all sorts of colors or plan a design creating stripes or other designs with specific colored pom poms.
- Glue on pom poms. Dip one pom pom in the tacky glue and then press on to the ball. Continue to dip/add pom poms tucking the poms close together so you don't see the ball underneath.
- Add the Ribbon Loop. First, create the ribbon loop for hanging by folding your ribbon in half and tying the 2 ends together. Next with the ribbon still folded, position the end of the ribbon loop in the pom poms so that the end with the knot is at the top (see photo). Push the straight pin through the ribbon and into the foam ball. If you want, you can secure the pin with a dab of glue.
- Let Dry. Gently rest the ornament on a covered work surface. Allow at least 1/2 hour to dry (the paper mache ornament will dry faster than the foam ball).
Expert Tips & FAQs
- If you are using a paper mache ball, you will need to hold the ball instead of using the skewer.
- You can use white school glue instead of tacky glue.
- If crafting with a group of kids, an adult can prepare steps 1-2 ahead of time and should help with step 5.
- If using a paper mache ornament, the hanger should already be attached and you will be able to skip step 5.
- Star Suncatchers - June 19, 2026
- DIY Garden Stepping Stones - May 22, 2026
- How to Make Bath Bombs - May 5, 2026


Leave a Reply