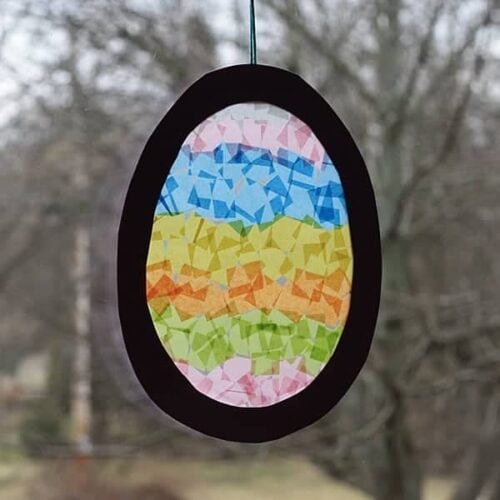
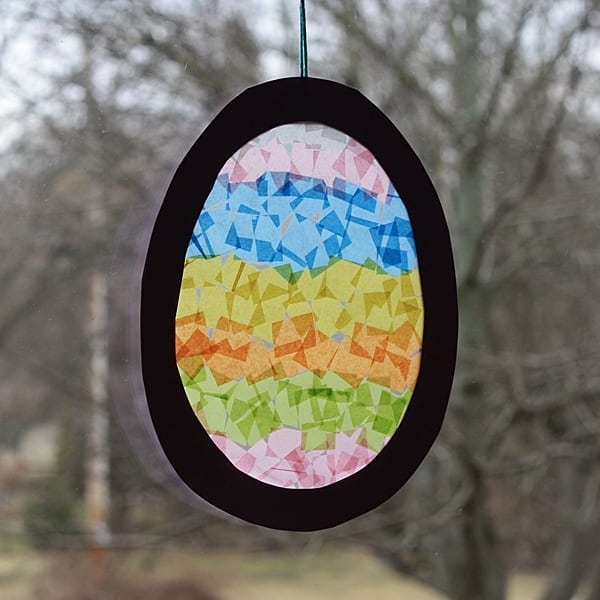
Tissue paper suncatchers have been around forever. They are fun to make and so pretty to look at. Today, we’re going to show you how to make an Easter Egg Suncatcher that’ll get you and the kids in the spirit of spring and Easter!
You can adapt suncatchers for every holiday, see our Heart Suncatchers and our Candy Corn Suncatchers for more holiday-themed ideas.
Easter Egg Suncatcher
This versatile craft is fun for all ages. You can use whatever tissue paper colors you desire, but today we decided to use pretty pastels to coincide with spring and Easter. This Easter egg suncatcher makes a fun classroom project or something to do with the kids at home!
What You’ll Need To An Make Easter Egg Suncatcher
- Clear contact paper – one roll will make a ton of suncatchers!
- 2 sheets purple construction paper
- Tissue paper in various colors
- 1 sheet white paper
- 12-inch piece of yarn
Tools
- Black marker
- Glue stick
- Scissors
- 4 pushpins
- Foam board or corkboard
FIND THE FULL PRINTABLE INSTRUCTIONS AT THE END OF THIS POST
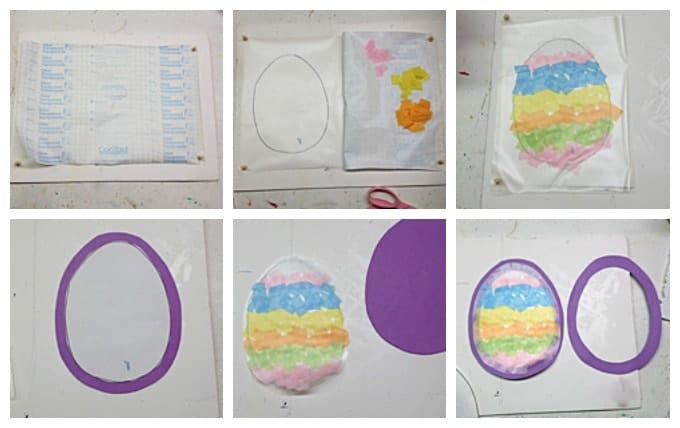
- You will need a sheet of contact paper that is twice the size of a piece of construction paper. Lay the contact paper, clear side down (do not remove the backing yet!) onto the foam board and tack it in place with pushpins, one in each corner.
- Draw an egg shape on white paper with a black marker. Slide the egg drawing underneath the contact paper on the left side. Carefully peel the backing off the left side of the contact paper (the sticky side should be facing upward) and fold it over to the right, tacking it under the pushpins on the right to hold it in place.
- Have children decorate the sticky side of the contact paper with tissue paper, using the egg drawing underneath as a guide.
- When children are done decorating, peel the backing off the right side of the contact paper and fold it over to the left, sticky side to sticky side. This will sandwich the tissue paper design between the contact paper.
- Take the egg drawing and cut it out. Use that as a guide to cut egg shapes from the purple construction paper. Stack both sheets of construction paper together and cut around the egg, leaving about a 1-inch border all the way around.
- Use the egg cut-out to cut the decorated contact paper in the same fashion, only leaving about 1/2-inch border all the way around.
- Tie your yarn into a loop. Use glue stick to adhere the egg inside the two construction paper eggs, creating a frame for your suncatcher. Be sure to glue the yarn inside with the contact paper egg.
More Easter Crafts
- Handprint Lamb for Easter
- Painted Rock Chicks
- Handprint Easter Lily
- Easter Bunny Mason Jars
- Washcloth Bunny and Chick
- Yarn Pom Pom Chicks
- Foam Cup Bunnies and Foam Cup Chick
- Easter Egg Wreath
- 7 Cool Ways to Decorate Easter Eggs
- 10 Tips for coloring Eggs with Toddlers
Easter Egg Suncatcher
Supplies
- Clear contact paper
- 2 sheets purple construction paper
- Tissue paper in various colors
- 1 sheet white paper
- 12- inch piece of yarn
Tools
- black marker
- glue stick
- scissors
- 4 pushpins
- foam board or corkboard
Instructions
- You will need a sheet of contact paper that is twice the size of a piece of construction paper. Lay the contact paper, clear side down (do not remove the backing yet!) onto the foam board and tack it in place with pushpins, one in each corner.
- Draw an egg shape on white paper with a black marker. Slide the egg drawing underneath the contact paper on the left side. Carefully peel the backing off the left side of the contact paper (the sticky side should be facing upward) and fold it over to the right, tacking it under the pushpins on the right to hold it in place.
- Have children decorate the sticky side of the contact paper with tissue paper, using the egg drawing underneath as a guide.
- When children are done decorating, peel the backing off the right side of the contact paper and fold it over to the left, sticky side to sticky side. This will sandwich the tissue paper design between the contact paper.
- Take the egg drawing and cut it out. Use that as a guide to cut egg shapes from the purple construction paper. Stack both sheets of construction paper together and cut around the egg, leaving about a 1-inch border all the way around.
- Use the egg cut-out to cut the decorated contact paper in the same fashion, only leaving about 1/2-inch border all the way around.
- Tie your yarn into a loop. Use glue stick to adhere the egg inside the two construction paper eggs, creating a frame for your suncatcher. Be sure to glue the yarn inside with the contact paper egg.
I originally made this project for Spoonful. Spoonful has since closed and the instructions were taken down. I am putting the instructions here until such time that Spoonful projects are redirected to a new home. At that time I will remove the instructions and link directly to the project on their site.
This post originally appeared here on Apr 6, 2014.
- Deco Mesh Poinsettia Flower - November 22, 2024
- Winter Luminaries: Snowy Pinecone Candle Jars - November 19, 2024
- Pinecone Owls - November 12, 2024


Sherry says
Thank you!
Janette McGill says
Hi Amanda
Would love some inspiration for an aged care facility. That means no glass, flames, sharp knives or scissors, anything that may injure. It is a big ask but our seniors love to make things but the hands may not be too steady now-a-days. We celebrate all the main celebrations and the living area is decorated to suit. Thanks Jan.
Amanda Formaro says
Hi Jan! There’s a ton of ideas in the Senior Crafts section https://craftsbyamanda.com/category/craft-tutorials/adult-crafts/crafts-for-seniors/ What I would suggest is doing the steps that may require scissors before working with the residents. Hope this helps!
Elizabeth says
I like the way these look but sorry I am unable to understand/follow the written instructions – are there any visual instructions (pics or video)?
Amanda Formaro says
I don’t have a video of this, however this video is basically the same idea https://www.youtube.com/watch?v=9oVW8EK8X88